Week 4 - Spartan Superway Internship
During our 4th week, I began working on side solar panel mounts for our track system. Although solar panels generally do not receive enough sunlight when mounted vertically to be efficient, we will be using them to match the aesthetic that we have with the curved top solar panel array. In order to do this, we first need to create mounts for our side I beams.
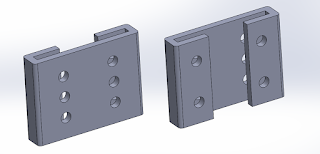
This first design I came up with was made to slide from below and up the side on the beam. However, I later found that there may be obstacles in the way such as bracing and other parts, so this idea was scrapped.
This first design I came up with was made to slide from below and up the side on the beam. However, I later found that there may be obstacles in the way such as bracing and other parts, so this idea was scrapped.
Figure 1: First side bracket idea
In order to accommodate any obstacles, I created a three piece design that features an L bracket on both inner sides of the beam and a main plate to hold the panels together. This desi3gn will be able to everything together using holes in the I beams, while still being able to be adjusted vertically for slight changes.
Figure 2: Inner I beam brackets
Figure 3: Inner brackets and outer plate installed on beam
Once put together, we can finally mount the solar panels onto the brackets. One of problems I faced was with the dimensions of the lip on the solar panel. For both sides, they end up between the face of the beam, meaning that finding a way to bolt them in will be more difficult. One idea was to create extension brackets to extend mounting holes outwards, however I felt that this would be a waste of material.
Figure 4: Installed with panels
In the next coming weeks, I will be improvising my designs to be better used with sheet metal. By using sheet metal, we save money on materials and manufacturing. I will begin going back to my designs to redesign them and make any other changes to accommodate the restrictions of sheet metal.


Comments
Post a Comment